Sound Generation and Musical Microcontrollers
2026-04-14 | By bekathwia
DACs Speakers Single Board Computers
Today, we’re exploring sound generation and musical microcontrollers. Whether you’re building a talking robot or your own DIY synthesizer, this episode will help you choose the right parts for adding audio to your projects.
In past episodes of my Electronics with Becky Stern YouTube series, we’ve covered topics like addressable LEDs and microcontroller selection, and this post builds on those skills. But instead of light, we’re making noise.
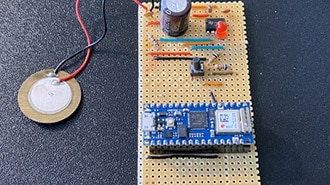
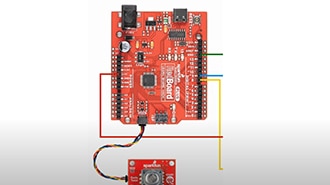
Piezos

Let’s start with the simplest sound output: the piezo buzzer.
A piezo element turns electrical signals into mechanical vibrations, producing sound. There are two kinds - active piezo buzzers have a built-in oscillator, so if you apply DC voltage, they make a fixed tone. The other type is passive piezos, which need a square wave signal to generate sound.
Piezos are inexpensive, lightweight, and perfect for beeps and alarms. But they can’t reproduce complex audio or music very well. For that, you’ll want a speaker.
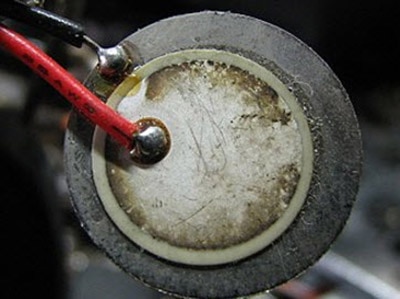
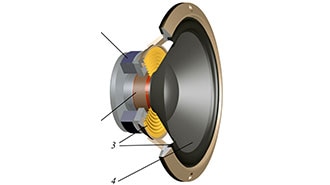
Speakers

Small speakers, when paired with an appropriate amplifier circuit, can play anything from generated waveforms to recorded samples. They are larger and require more power than buzzers, but the sound quality is worlds apart.
Because of their power requirements, you can’t drive a speaker directly from a microcontroller pin– you need an amplifier, even for small speakers. Microcontrollers can generate audio by outputting waveforms, either with a dedicated DAC, or Digital to Analog Converter, or through bitbanging. One fun thing to do is hook up a signal to an oscilloscope so you can see and hear the different wave shapes at the same time.
This is the Thingamagoop, which generates basic audio wave forms.

For example, try the Mozzi Library for Arduino, which lets you synthesize sound, and it's super fun. It’s what Nick Chelyapov used to develop his Bitty synthesizer.
Audio Playback

If audio playback is more interesting to you than bleeps and bloops, you can skip the coding entirely and use a playback module like the Adafruit Audio FX Board. It can store and play audio clips from onboard flash, which mounts like a USB drive on your computer. It’s my go-to for projects that require audio sample playback, but it’s far from the only option. Check out how tiny the DFPlayer is, for example.

I’ve made so many projects with these simple playback modules, including Penny’s computer book from Inspector Gadget, A jacket that brings its own laugh track, and a portable white noise machine in a coffee cup. The Audio FX board is available in two different memory sizes, so be sure to order the one with more storage if you have long samples or a long overall total duration of audio.
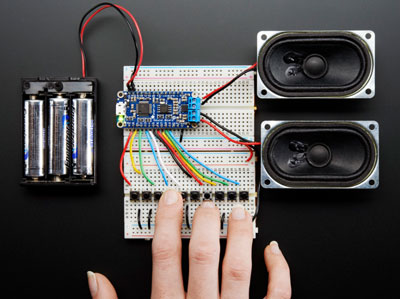
Although you can process playback audio on an Arduino hooked up to an SD card, like with an old Wave Shield (my first audio playback board), it takes up all the processing power of its Atmega328 microcontroller. So, it’s not super practical anymore because thankfully, we have the option to offload this processing to a different board or use a more powerful microcontroller. The RP2040, for example, can run Python code, including playing back audio samples. It’s what I used for my PS4 controller music sequencer I built for YouTube Makers Secret Santa last year.
The only tricky part of working with audio samples is getting their settings right for the platform you’re using. So be sure to read the included documentation and use an audio editing program to adjust the sample rate, mix down to mono, and export in the appropriate file format before transferring to your playback device.
Audiophiles might bristle at the idea, but most projects don’t really need stereo audio. Try it in mono first before you add unnecessary complexity to your project. But if you need stereo quality…
Maybe your project should run on a single-board computer like Raspberry Pi, which can easily play full-quality stereo audio.

You Got This.
I hope this guide gives you the confidence to start using sound in your projects. If you want to make your project react to sound, check out our previous guide about making sound-reactive projects.